
How to Choose Battery Cable, Lugs & Crimpers: AWG, Metric & Crimp Profiles
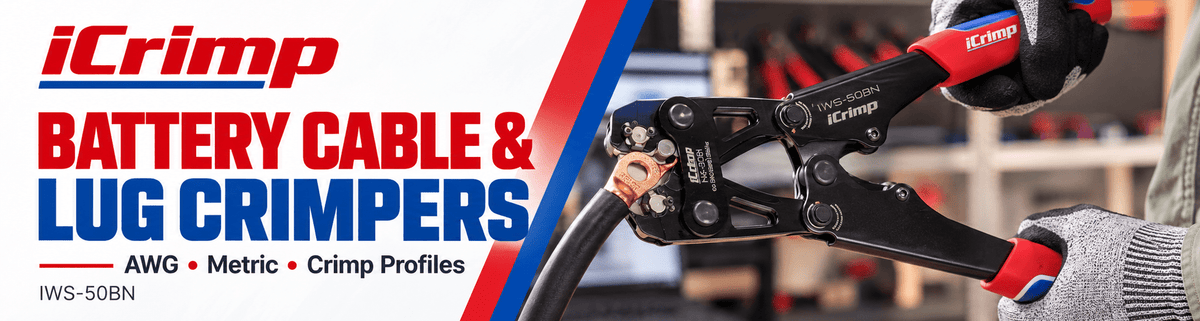
A dependable battery connection starts with three matched parts: the cable, the terminal and the crimping system. Choosing a crimper by its maximum wire size alone can overlook the lug's wall thickness, the conductor's stranding and the required crimp shape. This guide helps buyers compare AWG and metric models, handheld and bench tools, and pneumatic workstations.
Choose cable · Choose lugs · Compare profiles · Choose operation · US guidance · European guidance · Tools with photos · Learning & videos
1. Specify the battery cable before selecting the crimper

Image: CMG Lee / Wikimedia Commons, CC BY-SA 4.0, unchanged.

Record the conductor material, marked size, strand construction, insulation rating and intended environment. A flexible battery cable and a building wire can have the same nominal cross-section but different strand arrangements and bundle dimensions. Ask the terminal supplier to confirm compatibility with the actual cable construction.
- Size: use the cable manufacturer's AWG or mm² designation, not the outside diameter over insulation.
- Material: identify copper, tinned copper, aluminum or copper-clad aluminum. A copper-lug recommendation must not be transferred automatically to aluminum conductors.
- Environment: check temperature, oil, abrasion, moisture and routing requirements for the actual vehicle, equipment or installation.
- Electrical design: select conductor size from the load, cable length, allowable voltage drop, duty cycle, protective devices and applicable installation requirements. The crimper's capacity is not an ampacity recommendation.
AWG and mm²: useful comparisons, not a die-selection chart
| AWG size | Approximate conductor area |
|---|---|
| 8 AWG | 8.37 mm² |
| 6 AWG | 13.3 mm² |
| 4 AWG | 21.2 mm² |
| 2 AWG | 33.6 mm² |
| 1 AWG | 42.4 mm² |
| 1/0 AWG | 53.5 mm² |
| 2/0 AWG | 67.4 mm² |
| 3/0 AWG | 85.0 mm² |
| 4/0 AWG | 107 mm² |
35 mm² and 2 AWG are close in area but are not interchangeable die labels. Likewise, 50 mm² is not exactly 1/0 AWG. Use the terminal maker's specified tool and cavity. Read our US & Metric Tool Size Guide for measurement terminology.
2. Match the lug barrel and connection point
A ring lug has two separate fit requirements: its barrel must suit the conductor, and its palm hole must suit the stud. A designation such as a conductor area followed by an M-size identifies different dimensions; the stud size does not specify cable capacity.
- Closed-barrel / tubular compression lug: check conductor size and class, barrel bore, wall thickness, strip length, crimp locations and approved tooling.
- Open-barrel terminal: check the terminal drawing and wing geometry. The forming cavity must suit the terminal's material thickness and conductor fill.
- Power connector contact: identify the exact contact part number and wire size. A connector housing family alone does not identify the correct crimp cavity.
- Installation: confirm stud diameter, palm width, access, bend clearance, specified fastener torque and any required insulation or sealing.
Do not remove strands to fit an undersized barrel or fold conductors into an oversized terminal unless the connector manufacturer explicitly specifies that construction. A physically insertable cable is only the beginning of a compatibility check. Follow the terminal specification for conductor class and barrel construction.

3. Hex, B-crimp, indent and trapezoid: know the profile
| Professional term | What it describes | What to verify |
|---|---|---|
| Hexagonal crimp / hex crimp | Six-sided compression around a compatible barrel. | Exact lug, die code, conductor and prescribed crimp sequence. |
| B-crimp / B-shaped open-barrel crimp | Terminal wings are formed inward around the conductor. | Wing geometry, material thickness and the specified forming cavity. |
| Indent crimp / point crimp | A localized indentation compresses a compatible barrel. | Indent depth, location, terminal construction and tool setting. |
| Trapezoidal crimp | A trapezoid-shaped compression profile. | Use only for terminals specified for that profile. |
No profile is automatically the best for every terminal. A B-crimp is not the same as a hex crimp, and a single indent is not a four-indent contact crimp. Shape alone does not prove low resistance, pull-out performance or compliance. Follow the specified terminal and tooling combination.
4. Choose how the operator will work
| Operating method | Typical buying priority | Examples in this collection |
|---|---|---|
| Handheld manual | Portable repair and occasional cable preparation; suitable handle force and access. | HX-50BI / HX-50B; IWS-0810N |
| Long-handle manual leverage | More leverage and sufficient clearance for a complete handle stroke. | IWS-0801C / IWS-1040S; IWS-5100A / 8200A / 25500A |
| Bench-mounted manual | A fixed work position for repeatable cable preparation without compressed air. | IWS-0801DTS / 1040DTS; IWS-5100DT / 8200DT / 25500DT; IWS-70DT |
| Pneumatic workstation | Repeated assembly with a suitable air supply, matched dies and controlled setup. | AM-70, 6–70 mm²; AM-240, 16–240 mm² |
Long handles do not automatically make a tool suitable for floor operation. Use a ground-supported or fulcrum-supported method only when the exact model's instructions permit it. Do not improvise extensions, hammer the handles or step on the tool. Bench tools must be secured to a suitable stable surface.
For pneumatic equipment, check the selected machine's pressure, air-delivery requirements, hose and preparation instructions. Keep AM-70 and AM-240 die families separate; a similar profile name does not prove that dies are interchangeable. Select a complete machine when needed: a replacement-die option does not include the workstation. See pneumatic and electric crimping equipment.
Shop by terminal type and working method
Match the terminal first, then choose the tool format. These are different applications, not interchangeable alternatives. Open each product to check the exact variant, cavity sizes and contents.

Handheld hex crimping
HX-50BI / HX-50B
HX-50BI: 8–1/0 AWG. HX-50B: 6–50 mm². Choose the sizing system specified for your compatible copper lugs.
View sizes & compatibility
Open-barrel B-crimping
IWS-510 / IWS-1030
IWS-510: 14–11 AWG. IWS-1030: 11–8 AWG. For matching open-barrel terminals, not tubular-lug hex crimps.
View sizes & compatibility
Bench-mounted hex crimping
IWS-0801DTS / IWS-1040DTS
0801DTS: 8–1 AWG. 1040DTS: 1/0–4/0 AWG. A secured manual workstation for recurring cable assembly.
View sizes & compatibility
Pneumatic cable assembly
AM-240
16–240 mm² machine family. Confirm the required die profile and air supply; replacement dies alone do not include a machine.
View sizes & compatibility5. US / North American selection checklist
For AWG-marked cable, start with the exact conductor size and construction, then obtain the terminal manufacturer's tooling instructions. An AWG label describes sizing; it is not a certification mark.
UL 486A-486B is a wire-connector standard with a defined scope covering conductor materials, sizes and constructions. Its scope includes specified strand configurations and other configurations identified by marking. Do not assume that a connector evaluated for one construction accepts every fine-stranded battery cable. Check the exact connector's certification and instructions rather than describing a generic crimper as “UL approved.” Read the official UL 486A-486B scope.
Use the cable's applicable product and installation requirements for the project. Automotive battery leads, marine wiring and building-installed energy equipment can have different requirements; a tool's AWG range cannot establish compliance for all three. UL Solutions' wire and cable resources explain certification and marking verification. Our AWG sizing guide helps distinguish conductor area from finished cable diameter.
6. European / metric selection checklist
For metric cable, record the nominal mm² area and conductor class. IEC / EN 60228 conductor terminology distinguishes solid, stranded and flexible constructions; the selected lug must be suitable for the actual construction.
DIN 46235 describes a compression-lug system with defined dimensions and markings. A DIN-marked lug's crimp requirements must be followed with the appropriate tooling. A generic metric jaw marked “35” is not automatically an approved DIN die. Standard tubular lugs and DIN 46234 terminal designs should not be treated as identical to DIN 46235 compression lugs. .
“Metric,” “hex,” “DIN” and “CE” describe different things. A metric size range or a hexagonal result does not by itself establish compliance of the finished connection. Confirm the documentation required for your equipment or installation. Jump to the metric/AWG measurement guide before comparing tool ranges.
7. Common applications and the decision that matters
- Vehicle starting-battery leads: identify whether the connection uses a tubular lug, open-barrel OEM-style terminal or a specific power contact before selecting the profile.
- RV and inverter battery cables: establish cable size from the circuit design and cable run, then match the lug and tooling. A larger crimper does not compensate for an undersized cable.
- Marine or outdoor equipment: confirm conductor and terminal materials, corrosion protection, sealing and the applicable installation rules. Tool compatibility alone is not marine approval.
- Workshop or production batches: compare manual bench and pneumatic setups, including cable support, tooling changes, first-piece inspection and recorded settings.
8. Preparation, crimping and inspection

- Make the work electrically safe. Isolate the circuit and follow the equipment's battery-disconnection procedure before handling conductors.
- Prepare a clean cable end. Use a suitable cutter and strip to the terminal maker's required length without cutting strands.
- Check the combination. Confirm cable, lug, model, cavity/profile and any required settings. Insert the conductor and position the terminal as instructed.
- Complete the prescribed crimp. Follow the required stroke, number and location of compressions. Keep hands clear of closing tooling.
- Inspect before continuing. Check for misplaced conductor, escaped strands, damaged insulation, barrel cracking and incorrect terminal orientation. Apply the manufacturer's dimensional and pull-force acceptance criteria where specified.
- Finish and install correctly. Apply specified insulation/sealing and strain support, and tighten the connection to the equipment or terminal manufacturer's torque requirement.
A hand pull is a useful gross check, but it is not a substitute for a specified pull test, dimensional inspection or electrical validation. For production, retain the terminal and cable part numbers, tool/die identification, settings and first-piece results. Recheck after changing materials, dies or adjustments.
Frequently asked selection questions
Does a 250A–500A terminal label tell me which cable to buy?
No. Some open-barrel tool listings use legacy terminal-group labels. They do not define cable ampacity or an exact conductor cross-section. Obtain the terminal drawing and dimensions.
Can I buy one tool for both AWG and metric lugs?
Only when the selected tool and dies are specified for both exact combinations. Compare the separate HX-50BI AWG and HX-50B metric options; do not assume that neighboring numbers produce equivalent crimps.
Why are there fewer product cards than model names?
Related models are grouped in a single product selector. Choose the required variant on that page. Different kits remain separate when their contents serve different needs.
What should I send for a compatibility check?
Send the cable marking and strand construction, conductor material, lug part number or drawing, barrel dimensions, stud size, required crimp profile, intended workload and proposed tool model to sales@iwiss.com. For a powered workstation, include the available air supply.
Further learning and demonstration videos
- Compare iCrimp battery cable lug crimpers — model selectors, operating methods and size ranges.
- iCrimp US & Metric Tool Size Guide — measurement terminology for US and European buyers.
- IWS open-barrel manual-tool product page and demonstration video — review the model shown and its instructions.
- IWS bench B-crimp family product page and demonstration video — compare the fixed-workstation format.
- — tooling selection resources and training links.
- — an overview of tooling formats, not model-specific operating instructions.
- — educational sessions; registration may be required.
External references explain selection principles and do not certify compatibility with iCrimp products. Always use the current instructions for the exact cable, terminal and tool combination.
Have the materials already? A practical selection checklist
- Photograph the cable marking and terminal wire-entry end. Identify the conductor size, material and stranding; distinguish a closed tube from an open barrel or removable contact.
- Obtain the terminal part number and crimp specification. The stud-hole size, housing name or terminal-group amperage does not identify the correct die.
- Choose the operating format after matching the connection. Portable hand tools suit repair; securely mounted bench tools suit recurring manual work; pneumatic machines require the specified air installation.
- Verify the selected variant and contents. Different family members cover different sizes. Dies-only and cutter-only options are not complete crimpers.
Use the updated battery cable lug crimper buyer guide and model comparison. Compare IWS-510 / IWS-1030 for smaller open-barrel connections, CT-38 / CT-80 / CT-150 for their listed adjustable-jaw applications, and IWS-0801C / IWS-0810N / IWS-1040S for their fixed AWG hex cavities.